For my little one’s 7th birthday, he wanted to invite friends to a party at Xtreme Air which is a trampoline park. I was game – we tend to “outsource” birthday parties every other year, so decided I would let them do all of the work but I would still bake the cake.
Of course we headed over to Pinterest to get some ideas for a cake and decided to make a trampoline cake! On the scale of cakes I have attempted to tackle over the years, this was on the easier side. Bear in mind, baking and cake decorating is certainly not my strong suit, definitely like to cook more than bake! But, the boys really seem to enjoy the cakes I bake and both helped me with this one quite a bit.
Challenge #1 – my son wanted red frosting. I always use the Wilton Gel Icing Color, but red can usually prove to require many jars of it! Nothing a 2nd quick trip to Michael’s couldn’t solve though! I used four cans of Betty Crocker Whipped Frosting Fluffy White – but would have been fine using three.
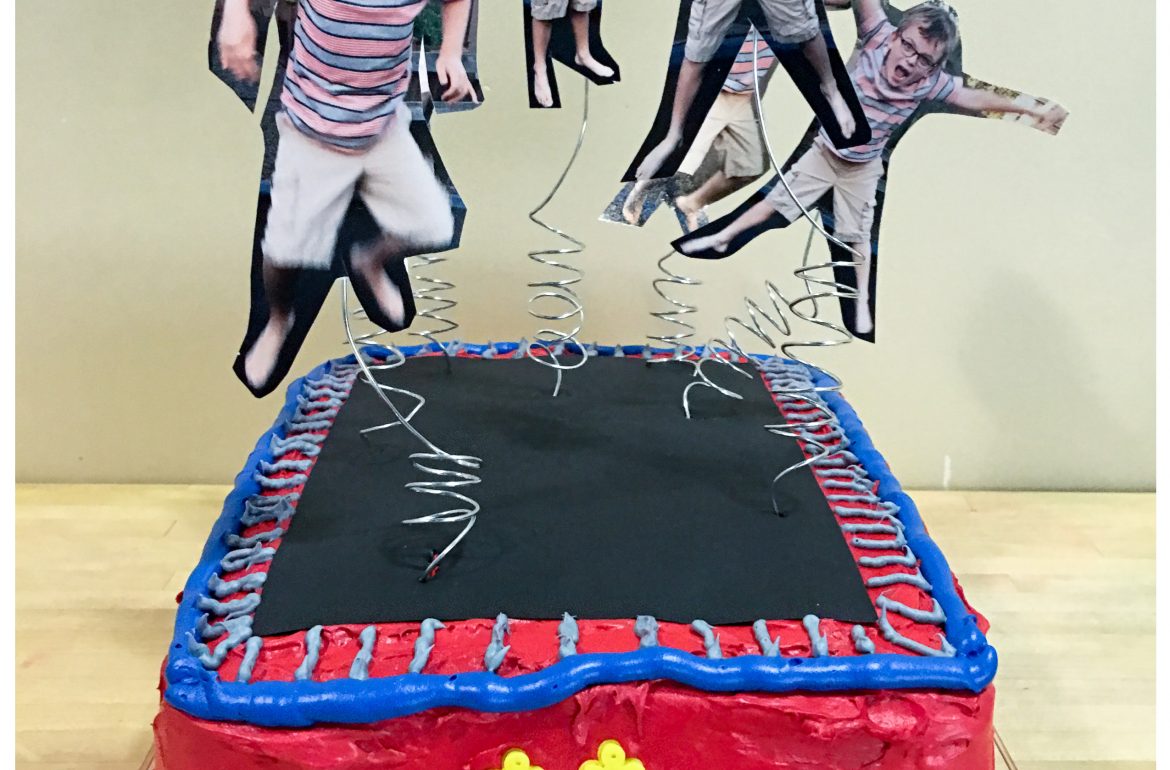
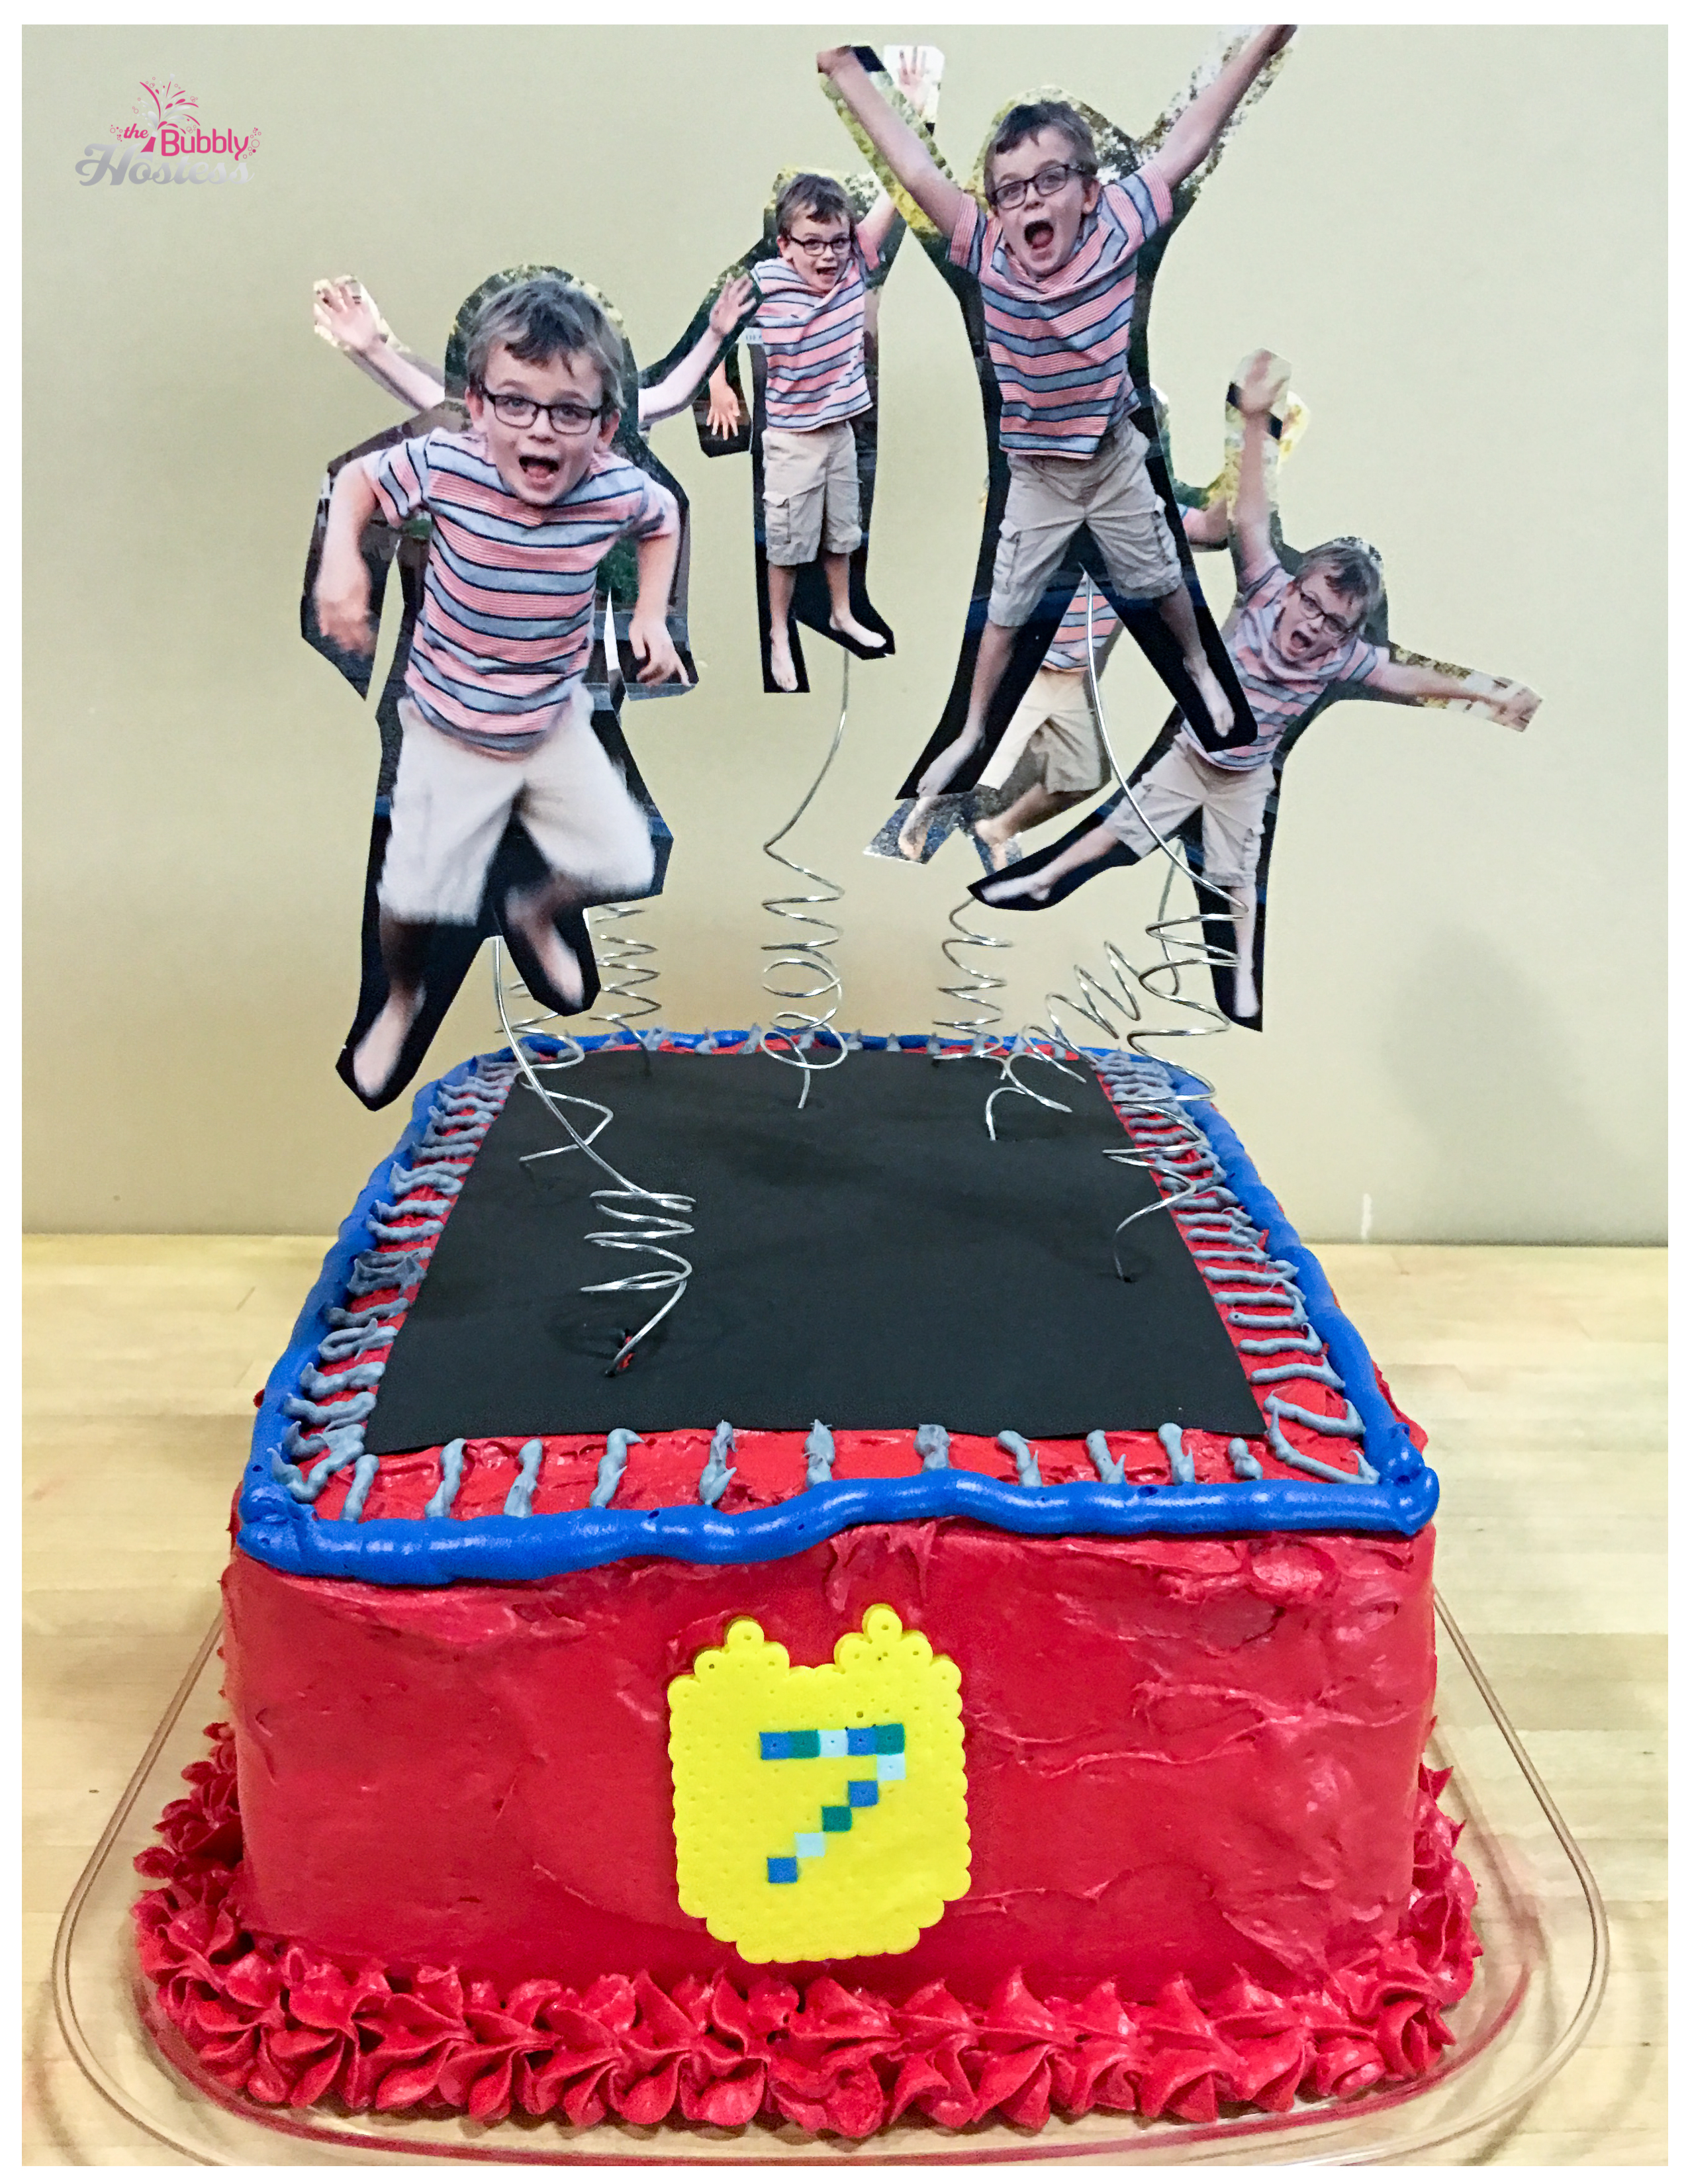
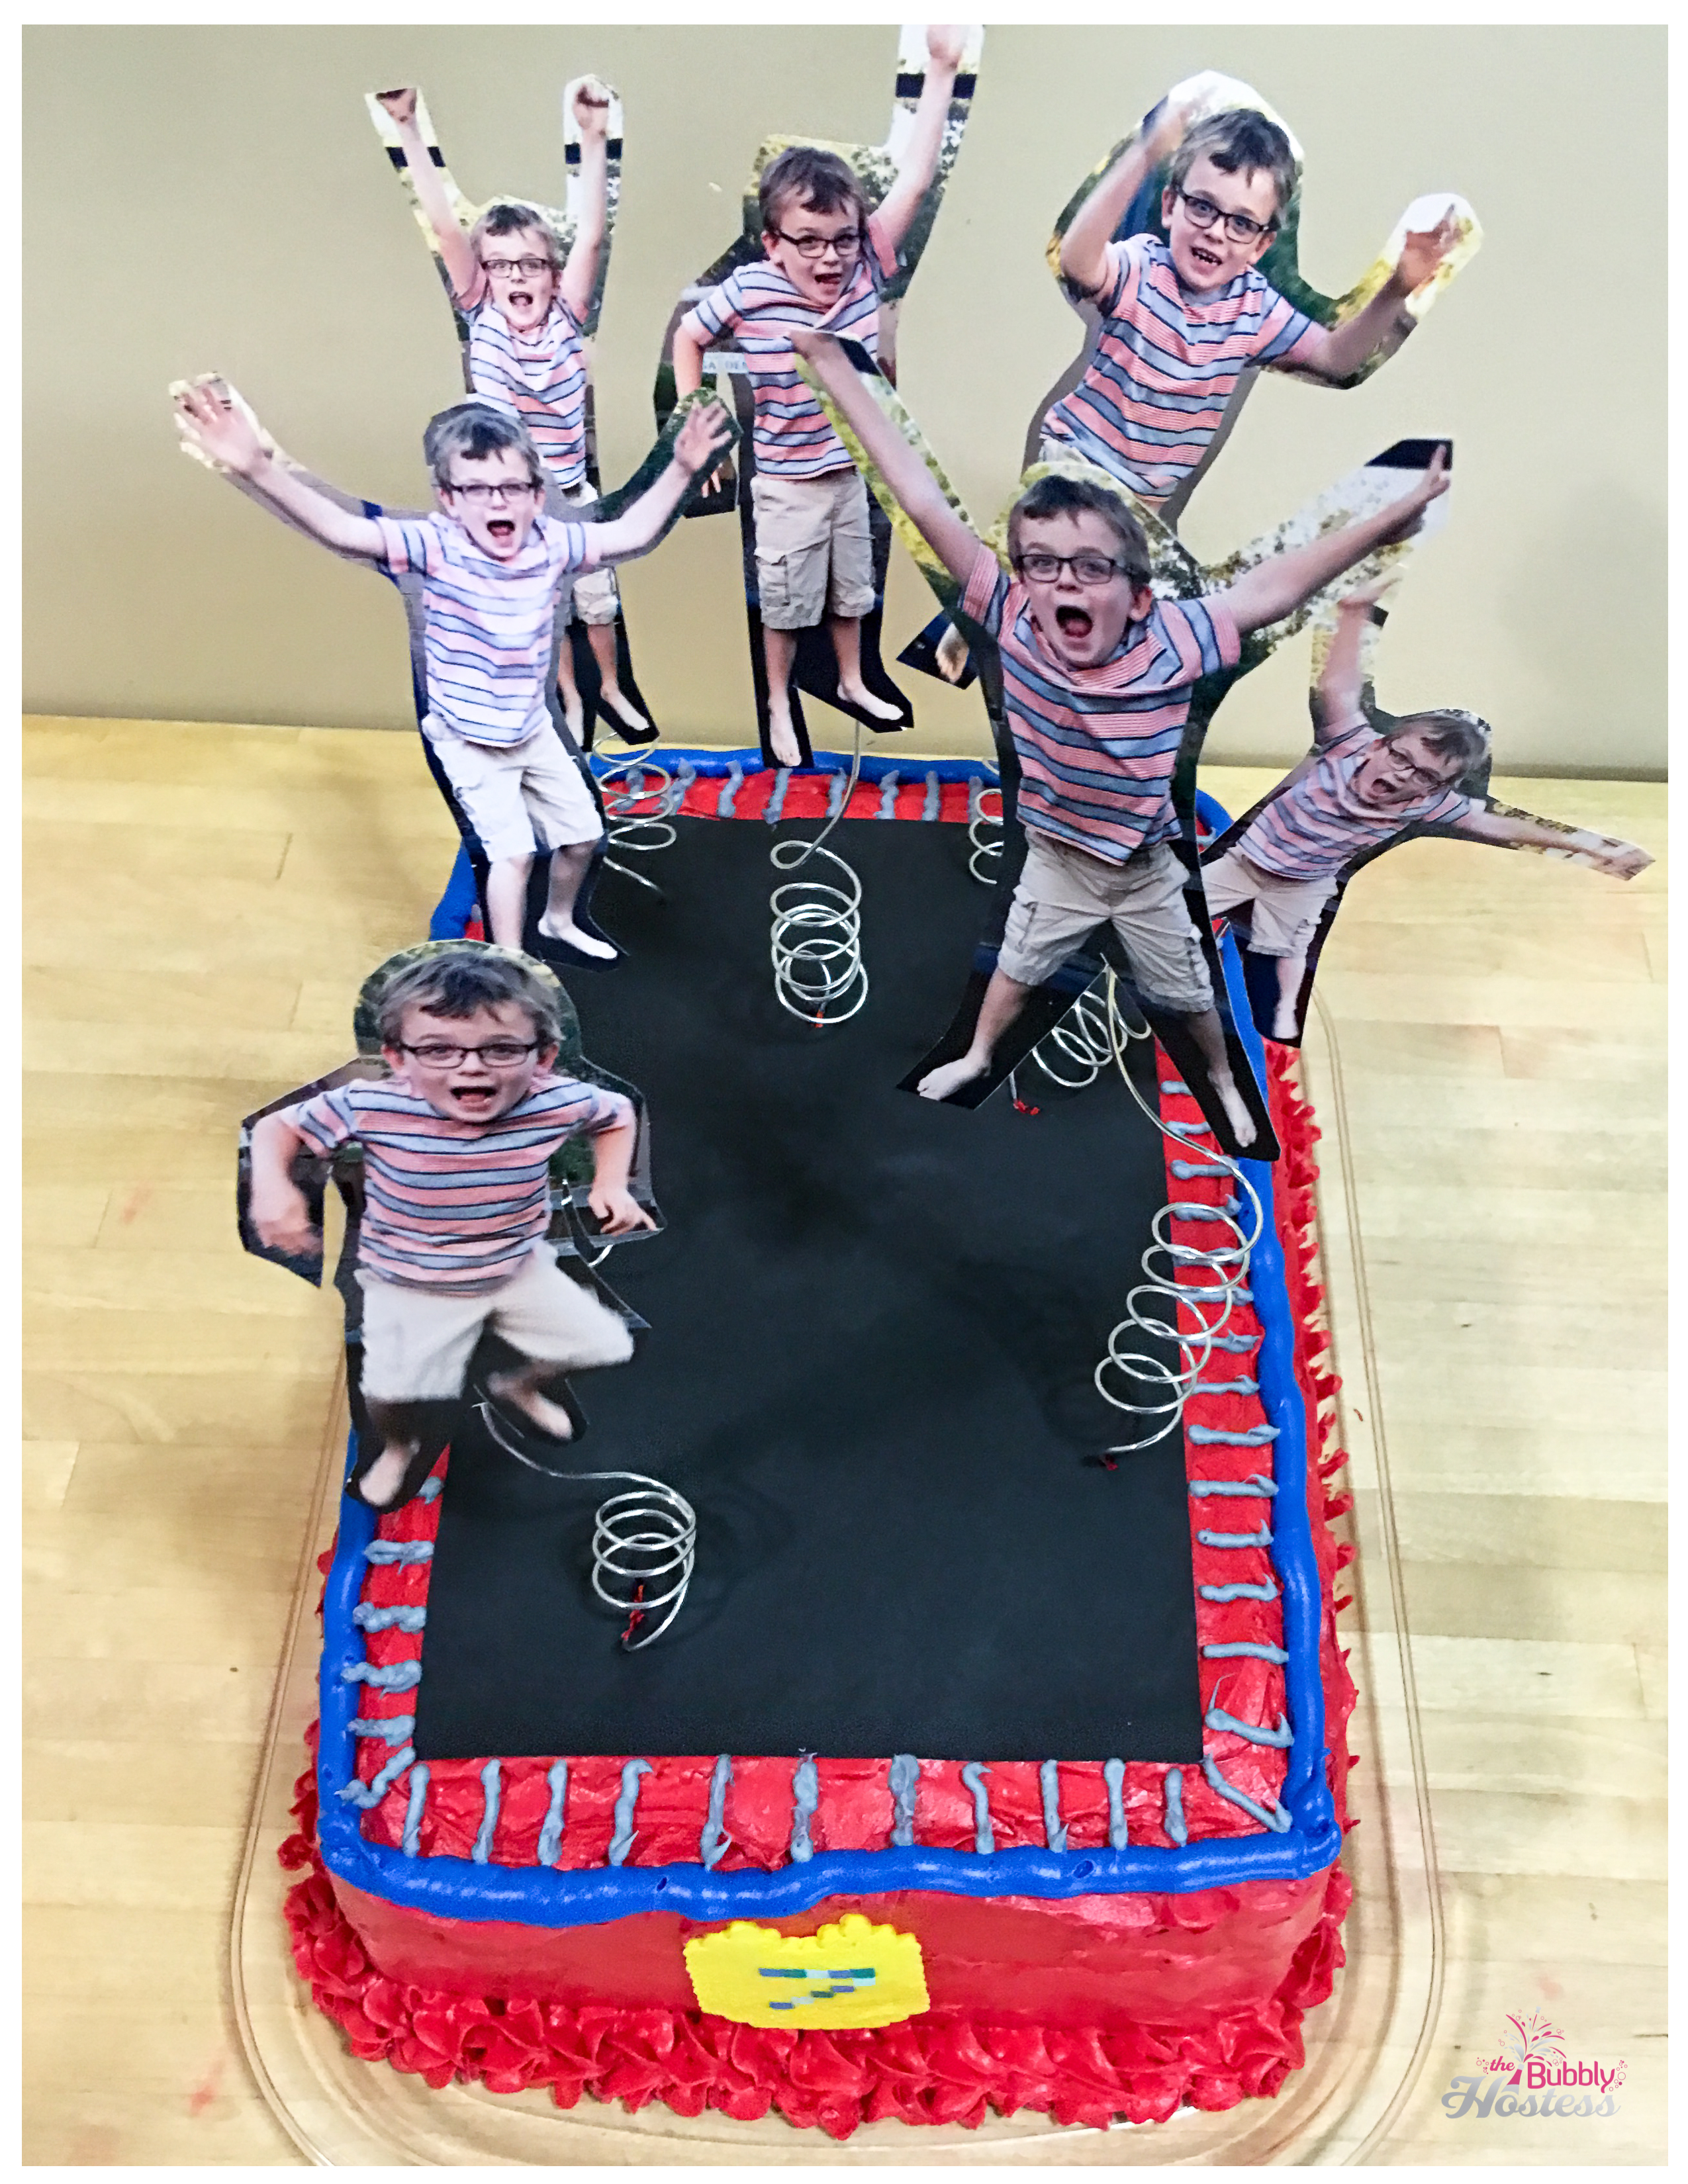
Challenge #2 – the Wilton Sugar Sheet The Hubby purchased for me to use as the trampoline was completely dried out. Nothing a 3rd quick trip to Michael’s couldn’t solve! Note to Hubbys purchasing sugar sheets in the future, make sure they feel pliable before purchasing them!
Once I got past these, it was a pretty quick process. This is a two-layer cake, using a 13″ x 9″ pan – but I put two Betty Crocker Super Moist French Vanilla cake mixes in each pan.
After frosting the entire cake, I cut the sugar sheet down a little bit and placed it on top. You want to make sure you have fresh frosting so that it acts like a glue to the sugar sheet. I placed the cake in the refrigerator at that point for about 30 minutes to let that set.
Next, I saved one can of frosting and split it between two bowls. In one I mixed with blue icing gel and in the other, a little bit of black icing gel (to create the silver/grey color for the springs). I piped the blue trampoline padding on first, then let set in the refrigerator again for about 30 minutes, then did the springs.
A few days prior, I took photos of my son jumping on our trampoline – of course you could take these with the child standing on the ground as well. I cut out the photos and used a 16-gauge aluminum wire to create the springs by wrapping them around a marker and then I taped them to the back of the photo.
My older son made the 7 “badge” the day before in summer camp and wanted it to be part of the cake too – it was the perfect addition!
The cake was a big hit with the party goers and the staff at the trampoline park! They even asked if they could take a picture to post on their social media sites!
I had a lot of fun making it and the boys both did a great job as my assistants!